

In my last post I discussed organizing your models by folder. I gave an overview of what I’ve found to be model organizational best practices, in this post I’m going to take us one step further and begin to show you how you can automate some of the best practices I presented in the last post. So, hold on, we’re going to take a leap into the world of script writing in GENESYS! Grab a caffeinated beverage and get ready (personally, I really miss Black Cherry Jolt Cola…) to dive in to the underworld of GENESYS code. Don’t worry, even if you’re not a coder, I promise to make this easy to understand and follow, and I’ll provide the script, so you can use this capability if you wish with no coding needed.
What if I said we could automate the folder creation to create a folder and move entities into that folder all at the push of a button? You’re probably thinking, ok, that’s not such a big deal, but might be useful… What if I say that you can do it in 10 lines of added code easily! GENESYS provides a powerful API that allows you, the user, to create custom scripts to do a variety of things to your model. The more you gain a deep understanding of the GENESYS metamodel and how you can apply rules and good data practices to it the more you’ll start to see all the ways that accessing the power of the API can help you perform tasks quicker and easier.
The first step in deciding to automate something with a script is deciding exactly what needs to be done – what are the requirements? In order to automate you need to know what exactly you want the script to do before you start to code it. As you’re developing it, new ideas may come to you. Improvements in the script, added features and other ideas will pop up, but have a plan for how you’re going to access the information you will need and what you’re going to do with it.
Going back to our organizing the model by folder discussion, wouldn’t it be nice to be able to select an entity that has descendants, create a folder underneath the current folder it’s in with the same name and possibly number as the selected entity, and then move the selected entity and its descendants into the new folder all at the push of a button? This would really speed up the time it takes to organize your model. With a command to do this you can create the folder based on simply selecting the right entity to serve as a folder name and move its descendants in one click!
Now that we’ve decided what we want to do, we need to learn how to do that. Logically we can figure out the steps needed (perhaps using an EFFBD in GENESYS?). The steps are:
- Get the selected entity so we can work with it
- Combine the entity’s Name and Number attribute into a string we can use to name the new folder
- Create the folder underneath the parent folder and name it with our newly concatenated string
- Move the entity into the new folder
- Get the selected entity’s children by following the decomposition relation
- Iterate through the descendant children and move them into the newly created folders.
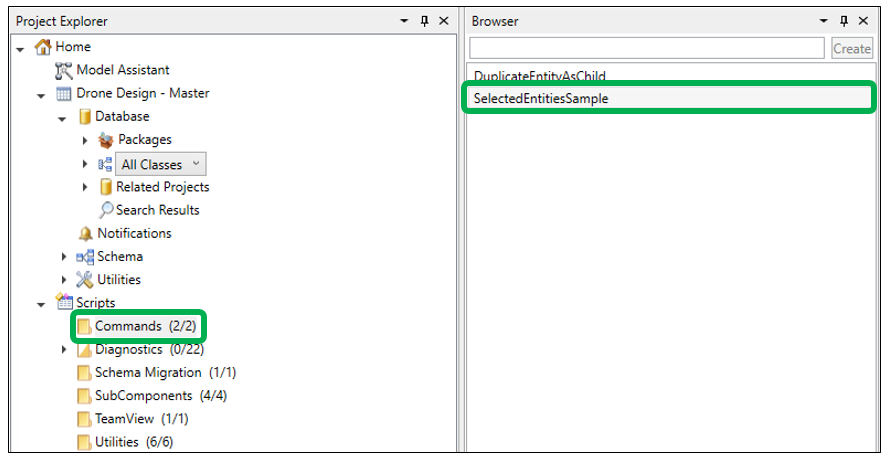
So now we know the first step is to get the selected entity with our script so that we have a starting point for our script. So how do we do that? Luckily, GENESYS provides some really good sample scripts and one of these in particular would serve as a great starting point for our new script. Let’s take a look in the Scripts folder (near the bottom of the Project Explorer Tree) and find look in the Commands folder. In the Commands folder we see two scripts that were provided with GENESYS, the DuplicateEntityAsChild script and the SelectedEntitiesSample script. Hm, the SelectedEntitiesSample seems like it might be a good starting point to me! We need to select an entity, don’t we?
The best practice when working with scripts like this is to create a copy of the script you intend as a starting point for you script, we don’t want to accidently start modifying the original script, since we want to preserve that for future use. Let’s start by copying it and renaming it something like, “CreateFoldersFromHiearchy”. Simply right-click on it and choose the duplicate command. Once we have our newly duplicated script, let’s go ahead and open it to edit it, simply right click and select edit.
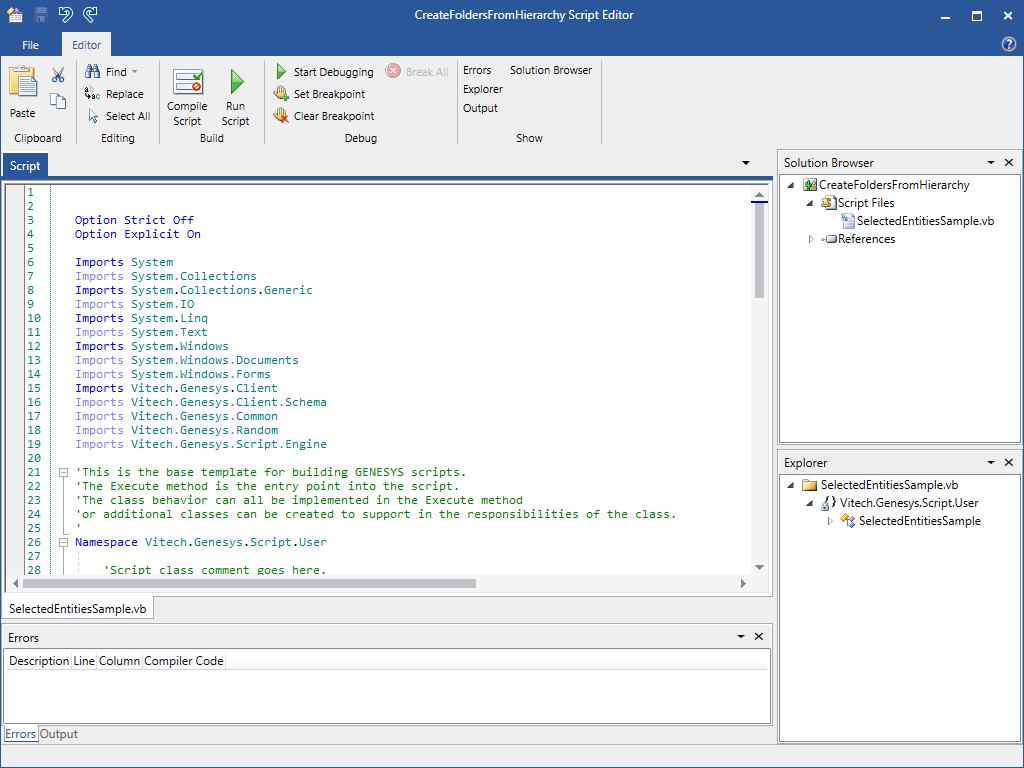
Welcome to the Script Editor! The first thing to note is that GENESYS has set up the Script entry points for you. Let’s scroll down a bit in this script and take a look at the place where we can start to insert our own code to make the steps outlined above occur. We’re looking for the “Execute” function, as this is really the starting point for our code. Line 64 is where Execute Function is defined.

Here we see the code that allows us to work with the selected Entities in the Project Explorer. For this post I’m not going to go in detail on every line of code, instead I’m going to explain how to insert the code we need to perform the folder operations we want. Don’t worry though, I will return to the code in my next post and we’ll get down into the individual code statements then. For now, I want to show the basic setup and get this helpful script running for you!
Our new code needs to go into the code that’s processing every selected entity. Luckily, we have just such a spot right after line 74, where we can insert our new code and it will run on each selected entity. Insert a line after line 74 in order to put our new code. Simply select the end of line 74 and hit return to create a new line. Now let’s paste the following code into that new line:
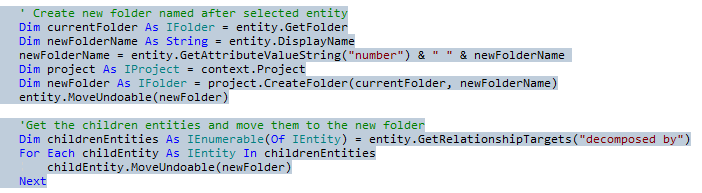
‘Create new folder named after selected entity
Dim currentFolder As IFolder = entity.GetFolder
Dim newFolderName As String = entity.DisplayName
newFolderName = entity.GetAttributeValueString(“number”) & “ “ & newFolderName
Dim project As IProject = context.Project
Dim newFolder As IFolder = project.CreateFolder(currentFolder, newFolderName)
entity.MoveUndoable(newFolder)
‘Get the children entities and move them to the new folder
Dim childrenEntitites As IEnumerable(Of IEntity) = entity.GetRelationshipTargets(“decomposed by”)
For Each childEntity As IEntity In childrenEntities
childEntity.MoveUndoable(newFolder)
Next
After adding the new code, we need to be sure to save this new script. Select the save icon up in the title bar to save the changes that were just made.
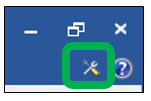
Pretty simple right? Well I think so, but we still need a way to trigger this logic to occur on our selected entity. How do we do that? GENESY provides the ability for the user to create their own commands in the ribbon menu. GENESYS makes it easy to assign a script to a button, or even fire off some other executable file. To access the editor, select the very small screw driver and wrench icon located on the right side of the project explorer next to the help button (right below the window controls)
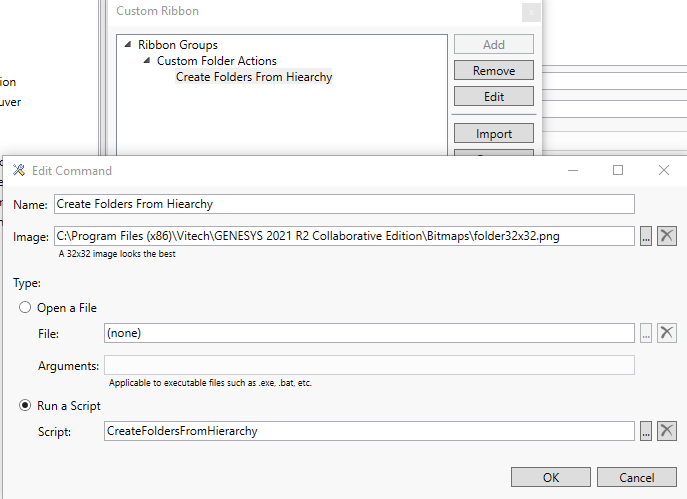
When you select the button, you’ll get the simple Custom Ribbon dialog box. In this dialog box simply select “Add” and then give a name to the new ribbon group you want to create, perhaps “Customer Folder Actions” to hold our folder acting script. After the creation of the group, select the newly created group and then select the “Add” button again. This will bring up the dialog that will allow us to assign a script to the new button. In this dialog you’ll create the name for your new button (pro tip: keep the name as short as possible!), select an image file for the icon (pro tip: the web’s full of useful icons, just resize them to 32×32 pixels) and finally select the script that we just modified to create the folders that will execute when the button is pushed.
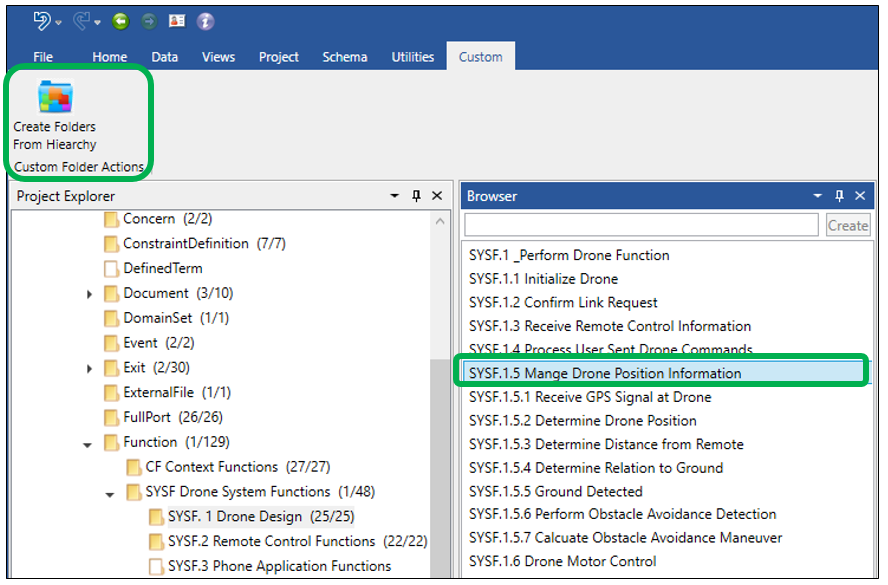
When you select Ok, you will see a new tab in the ribbon menu titled “Custom” and in this tab you’ll find your new button that when selected will execute the script we just created. Let’s test it!
With this script you can ctrl-select any entities in the browser window and once they’re highlighted you simply select the new button; the script will then execute and we should now have a new folder titled the same as your selected entity and entities that decompose it should be moved as well.
And the result:
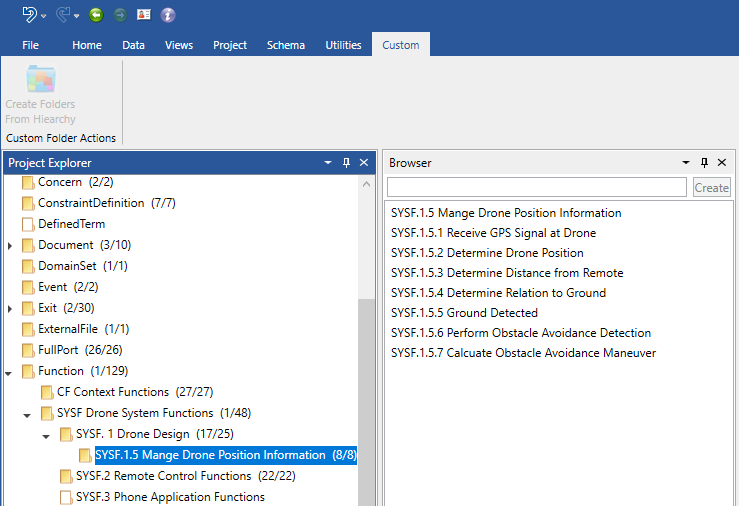
Here we can see the new folder was created underneath the parent folder, it was named after the selected entity including the number, and finally the entity and the entities related to it with the “decomposed by” relation have all been moved into the sub folder. A handy trick for sure!
So, we’ve taken a sample script provided in GENESYS, copied it, modified it to fit our new requirements, and then created a custom button to run the script on selected entities. That’s a pretty good first start! Congratulations! In my next my post, we’ll dive into the code a bit more and I’ll try to give you a really good understanding of what the code is doing, and maybe we’ll extend it a little bit to work with relations other than just the “decomposed by” relation. I hope this helps to demystify GENESYS scripting a little bit and will hopefully whet your appetite for more.


Hey Andy, very detailed instructions with explanations! This greatly simplifies work, important when all your data is structured and processes are automated. Automation of data processing significantly saves time and boosts the efficiency of the project, so I highly recommend considering it.